
How to Create a Multi-Step Form in WordPress [Plugin & Code]
Multi-step forms make it easier for users to complete lengthy tasks, such as registrations, surveys, or detailed submissions. If you're ready to implement one on your WordPress site, this guide will show you how to create a multi-step form in WordPress using a multi-step form WordPress plugin from Claspo or custom code.
What is a multi-step form, and when does it work best?
A multi-step form is a form that splits questions or input fields into multiple steps or pages, instead of presenting them all at once. This approach makes long forms less intimidating and easier to complete for users by breaking your form into smaller sections.
Multi-step forms are ideal for tasks like registrations, bookings, surveys, and other detailed form submissions. You can easily create multi step forms for various purposes, whether it’s a conversational form, a simple contact form, or a more complex lead generation flow. This flexibility allows you to split the form into multiple steps depending on your needs. Here’s why they’re worth using:
- Enhanced user engagement: splitting your form into multiple, manageable parts makes them less overwhelming and keeps users more engaged.
- Improved usability: progress indicators guide users and show how much of the form is left, making the process feel shorter and more structured.
- Higher completion rates: users are more likely to finish forms when they’re easier to navigate and don’t feel too long.
- Conditional logic: multi-step forms can collect only the information that’s relevant by dynamically adapting based on user inputs.
- Increased conversions: by reducing form fatigue and creating a seamless experience, multi-step forms can significantly boost submission rates.
How to create a multi step form in WordPress with Claspo
Claspo is a simple and flexible WordPress multi-step form builder for everyday tasks. You can create a free multistep form for WordPress that looks great on any device, supports multiple languages, and integrates with popular marketing tools. With Claspo, you don’t just add the form, you create a workflow that attracts potential customers and builds relationships with them.
Step 1: Install the Claspo plugin
First, you need to integrate the Claspo form builder plugin with your WordPress dashboard. Claspo works like a WordPress form wizard, making it easy to set up and customize your forms without coding. Here’s what you need to do:
- Create an account to use our widget maker for your website.
- Go to the WordPress plugin store, search for “Claspo” and click Download.
- Log in to your WordPress admin panel.
- Navigate to Plugins > Upload.
- Select and upload the file.
- Once installed, head over to Claspo and find the Script ID. In the left side panel, navigate to <>Script.
- Check the integration, and you’re all set!
Step 2: Go to Claspo and create a new form
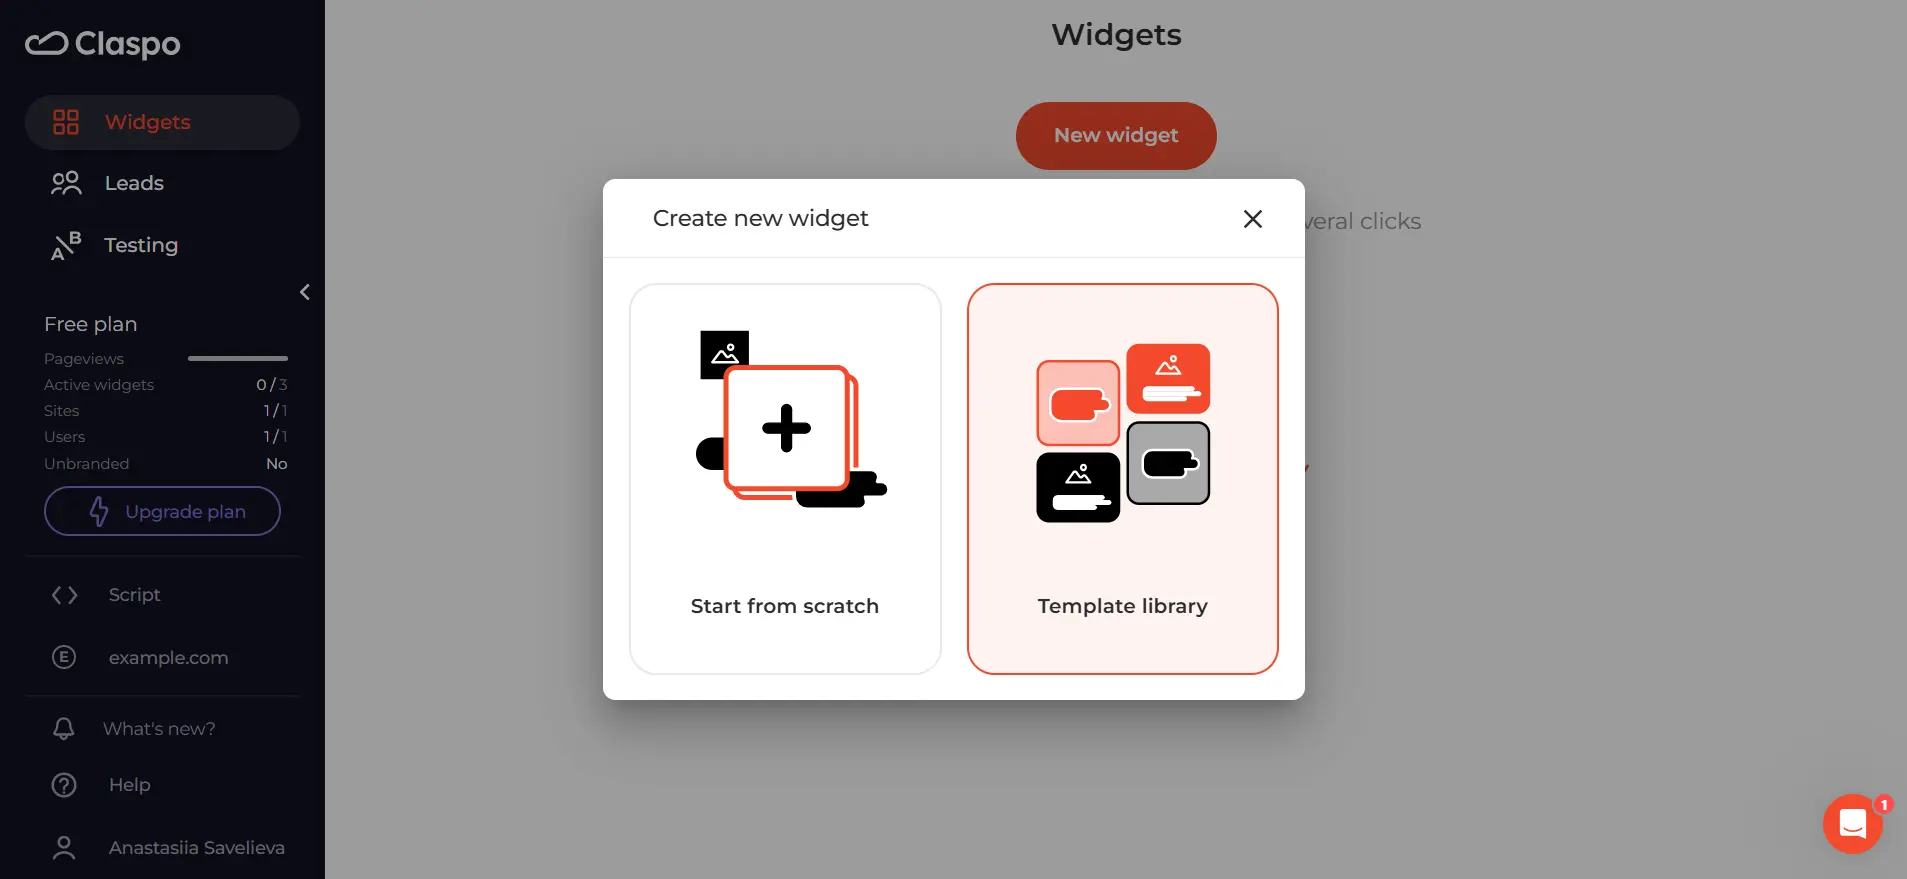
Sign in to your Claspo account, and let’s get you started. Click the New Widget button and select Template Library. If you’re feeling creative, you can start with a blank form and build your own layout.
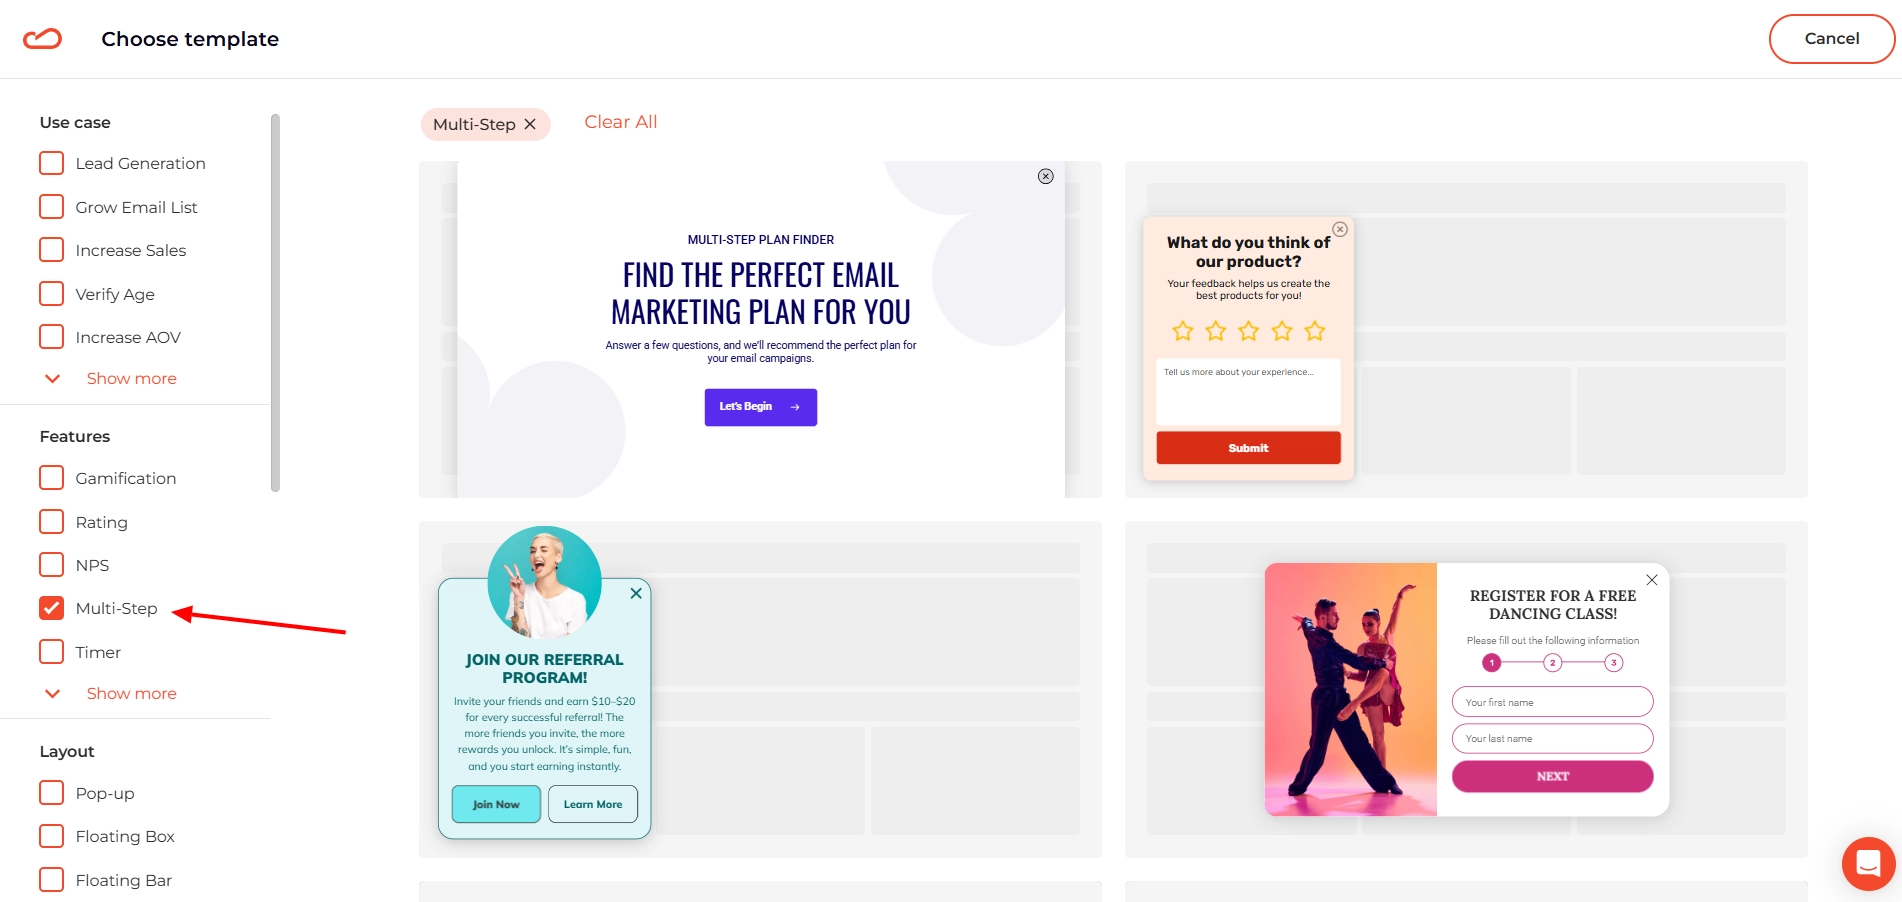
You’ll be introduced to our template catalog. In the Features filter, select Multi-Step, and you’ll see all multi-step form templates. Choose the theme of the multi-step form for your WordPress site.
Step 3: Design your multi-step form
For demonstration purposes, we’ll be using the following template:

This WordPress contact form already has three steps:
- First step of the form collects personal information.
- Second part of the form collects email and age.
- Next step of the form captures contact details and the desired date of the class.
We’re going to customize each of the sections of your form together. Let’s start with the main request form.
Important note: the multi step form example we’re using in the article shows a linear form. With Claspo you can also create a WordPress multi-step form with conditional fields. To achieve this, design the form's logic, create all the necessary form pages, and connect them.
This is done using buttons on each page (click the button in the form > General > Action on click). A button leading to the next step can be customized, allowing you to redirect respondents to the desired page.
We’ll replace the last name field with a field for users to share their age. This will give us an idea of what of the audience is interested in our classes and can help prepare the groups. We’ll also replace the text under the heading with more engaging copy that adds scarcity.
Let’s move to the next page. We’ll ask for the user’s email and find out their preferred dance style. Like with the first form, we’ll remove a default field and replace it with text input. We’ll also add some text under the heading to better explain why we’re asking for this information. Since we’ve already asked for the person’s name, we can add a merge tag to personalize this step.
And why not replace the image to make the form feel even more dynamic? Image our business teaches different styles — this is a great opportunity to reinforce that.
And for the final page, we’ll also replace the default text and image and make the phone field optional.
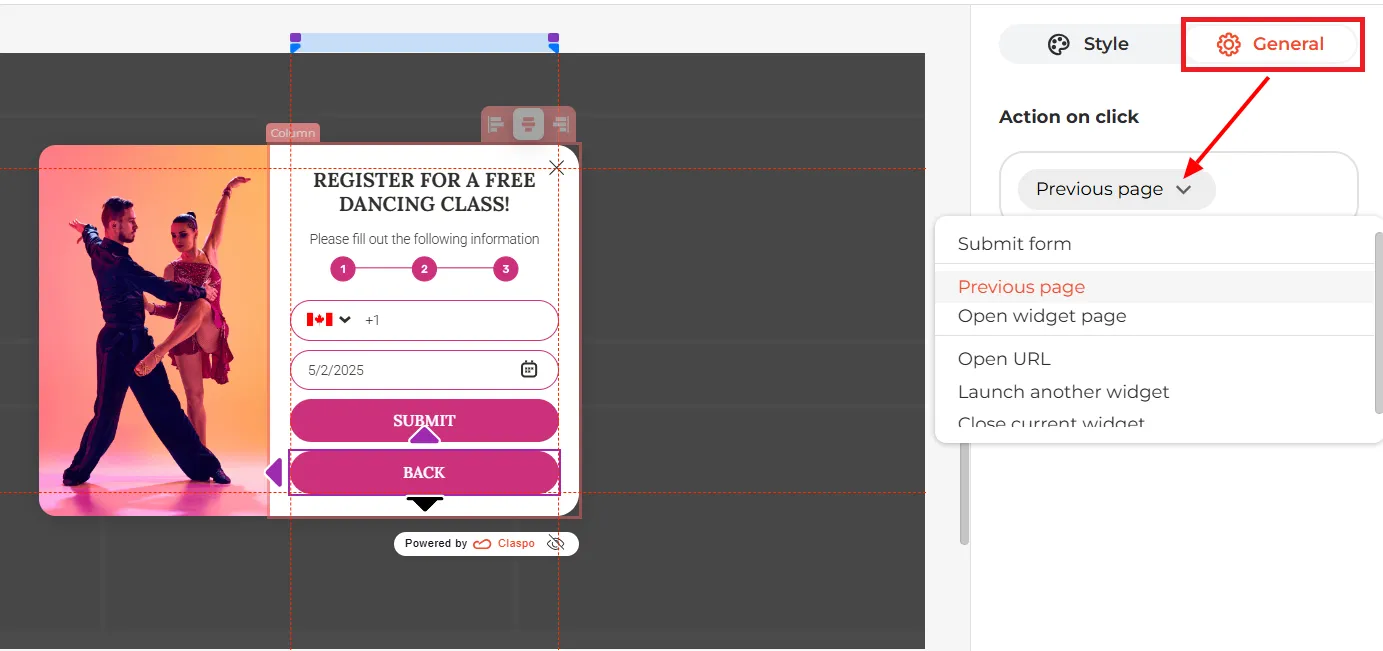
It’s smart to add a Back button here in case users want to change something they entered earlier. Just add a second button to the step, click on it, open the General tab, and select ‘Previous page’ under ‘Action on click’. That way, users can go back and make edits anytime.
That’s it. Now, we just need to customize the success and error pages. Let’s add more details on what to expect next and add a merge tag with the first name to personalize the form entries.
Step 4: Adjust the display rules
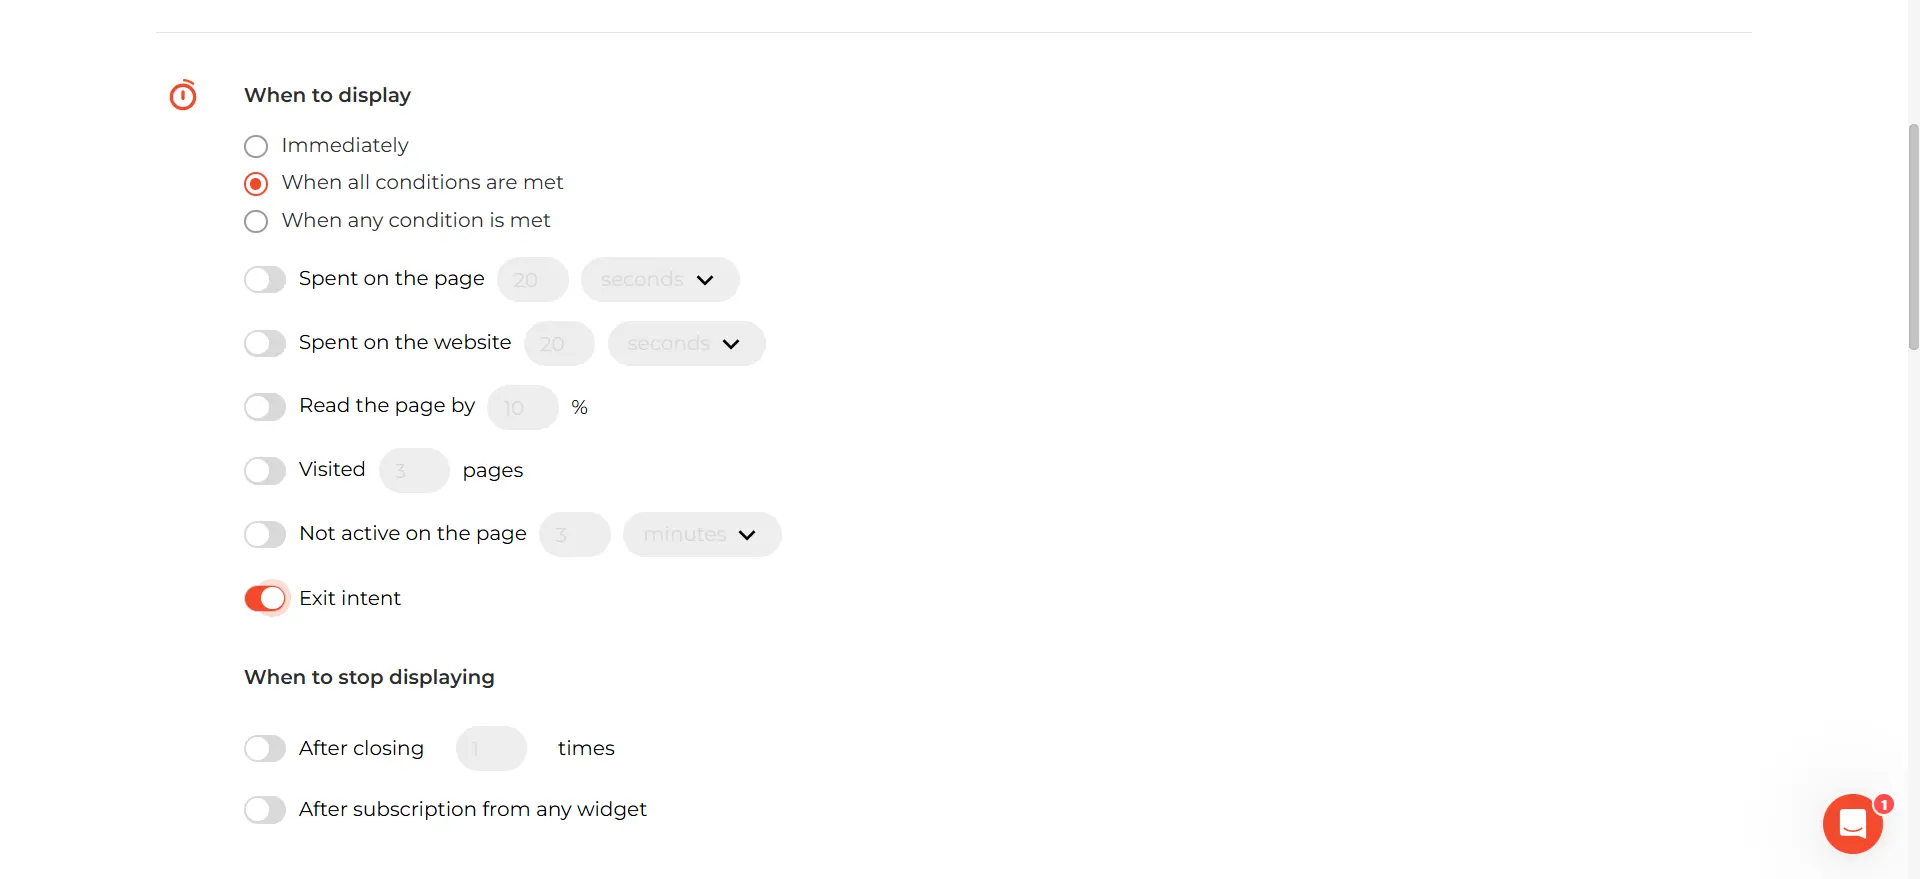
Now that the design is ready, let’s talk about display settings. This particular form on the front end is intended to be used to prevent website exit, so we’ll switch on the Exit intent toggle.
However, you can use this widget and any other type of form as a sign-up form. Claspo’s rules give you plenty of flexibility to make your targeting super precise. For instance, you can choose which pages the popup appears on or target users by their country or city. Why not create unique popups with special rewards for different locations? You can even use UTM parameters to ensure the popup feels like a natural part of a larger campaign.
You might have noticed three additional triggers available:
- Launcher trigger: a launcher is a small icon that stays in the bottom corner of the page. Users can click it to open the popup whenever they want. You can set it up during the first stage of popup creation or add it later. It’s perfect for giving users more control.
- HTML click trigger: this lets you use any clickable element on the page to show the popup. For example, it could appear when someone clicks an image, button, or text link.
- API trigger: this option lets you programmatically control when and how popups are displayed. It’s great for advanced customization, integrating with other services, or improving the user experience, but it requires some technical know-how.
So it’s up to you how to use the form; we’ll stick with exit prevention for this guide.
Step 5: Integrate your forms with ESP or CRM
The final step is to connect Claspo to your other tools, such as a CRM or email service provider. This allows the information collected through the form to automatically create leads in your CRM or trigger email campaigns. Once users submit the form, all collected data is securely processed and transferred.
Claspo integrates with many popular software tools. Simply choose the ones you need and map the fields to ensure all information is saved correctly.
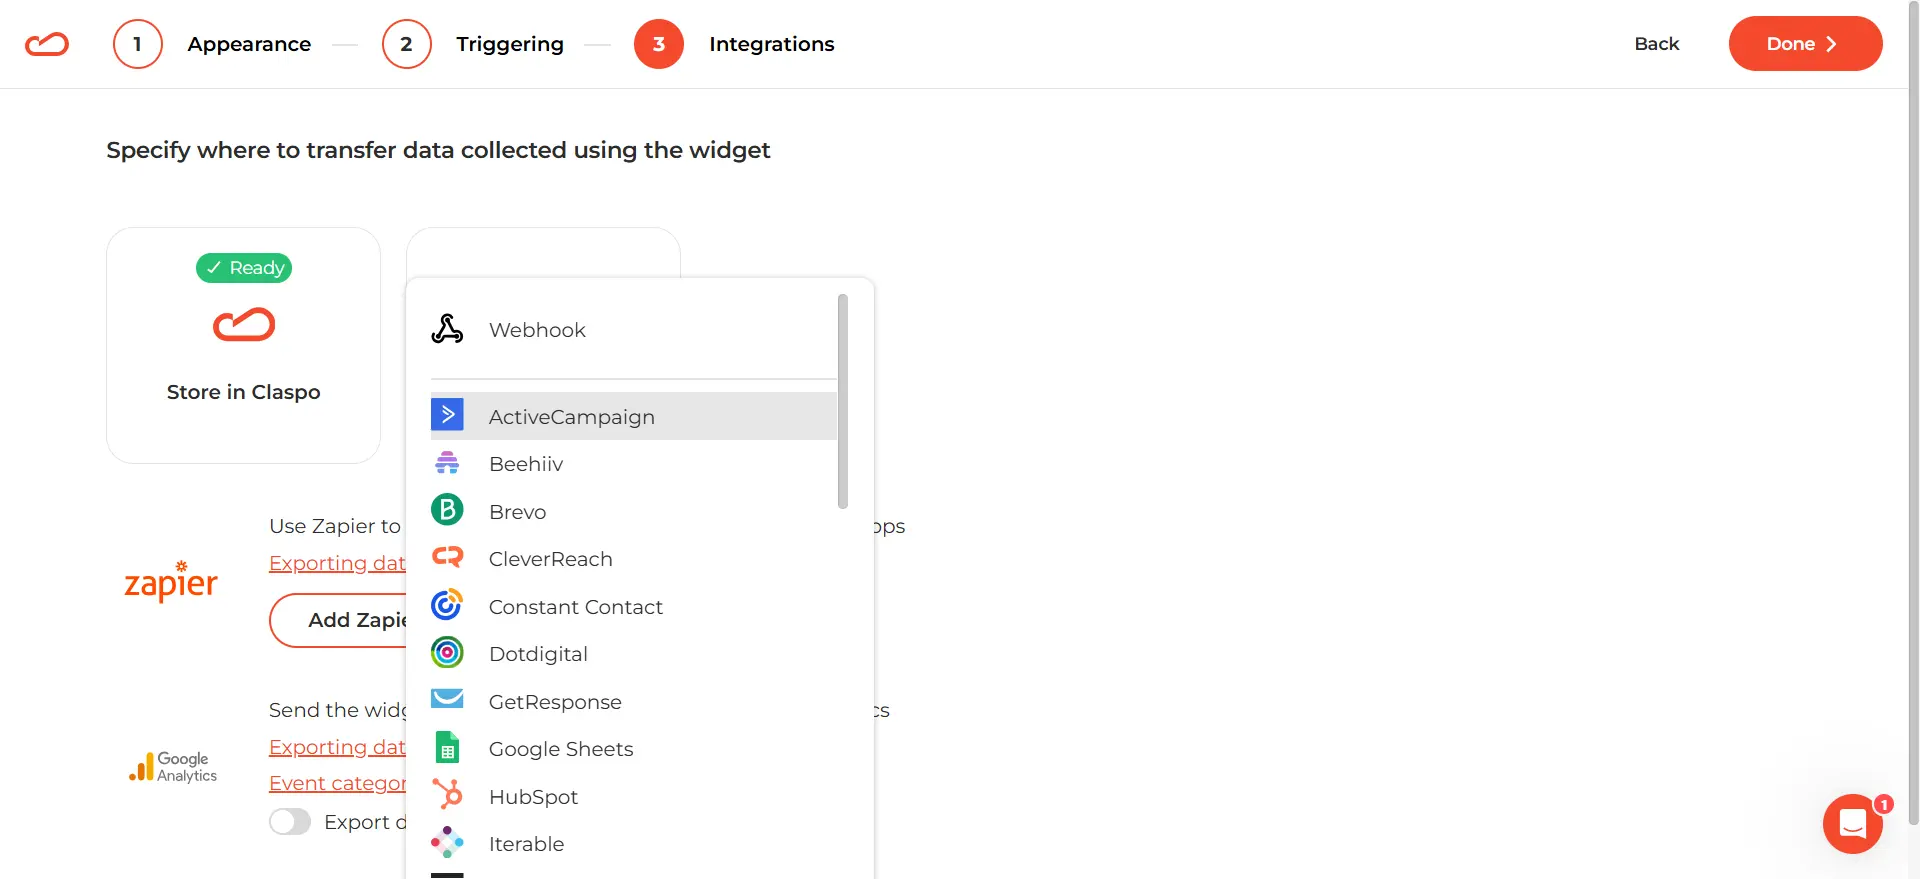
If a software provider is not on the list, you can create a webhook and transfer information from the form to virtually any system.
Step 6: Test and optimize
Claspo makes testing and optimizing your advanced WordPress forms easy. You can set up split tests with just a few clicks, and Claspo will gather performance stats on your site widgets. This helps identify weak points like form abandonment or user fatigue, allowing you to adjust your design for better results.
For even better insights, use heatmap tools or other software to see how users are filling out the form, then apply that data to run more effective tests in Claspo.
Step to create a WordPress step-by-step form with custom code
Creating a WP multi-step form from scratch is more than just a design task; it’s a collaborative effort that requires input from various roles to ensure both functionality and a seamless user experience. Depending on the complexity of the form using custom code, you might need:
- A UI/UX designer to craft an intuitive design.
- A frontend developer to implement the interface and navigation logic, including any necessary form page break block configurations.
- A backend developer to handle data storage and processing.
- A QA specialist to test the form across devices and scenarios.
For a straightforward form you want to build, this process might take a small team about 20-40 hours. However, complex forms with advanced features like real-time validation or integrations could require 60-100+ hours, depending on the scope.
Step 1. Defining the purpose and structure
The foundation of a multi-step form starts with understanding its purpose. This requires collaboration between stakeholders and product managers to identify the form’s goal and the type of information needed. The information is then broken down into logical steps to ensure it flows naturally.
Step 2. Designing the user interface
Once the structure is outlined, the focus shifts to designing how the form looks and functions. A UI/UX designer creates a visual blueprint. The design stage is crucial for ensuring clarity and ease of use, as these directly impact user engagement and completion rates.
Step 3. Developing the Frontend
At this stage, the form begins to take shape through frontend development. Using the design as a guide, the frontend developer creates the layout for each step and implements the navigation system, typically with support from a FinTech software agency. This may include setting up a form container option to organize form elements and steps cleanly.
Step 4. Adding validation and feedback
Validation ensures the accuracy and completeness of the information being collected. Input validation can occur in real-time on the frontend or after submission on the backend.
For example, the system may check that email addresses are correctly formatted or that required form fields are not left empty. Providing instant feedback keeps users informed about errors or missing details, reducing frustration and ensuring data quality.
Step 5. Implementing data handling
With the navigation and validation in place, attention turns to handling the data. The backend developer ensures the information users submit is securely captured and stored.
This involves setting up servers or APIs to receive the data and saving it in a secure database. In cases where the form is complex or integrates with third-party tools, additional backend work may be required to manage these connections seamlessly.
Step 6. Testing and refinement
Before the multi-step form is ready for users, it must be rigorously tested to ensure everything works as intended. Testing also identifies potential user experience issues, which are addressed during this phase. Refining the form based on these insights ensures a polished final product.
Types of forms that convert better in the multi-step layout
Just like there are best uses for simple, one-step forms, WordPress multi-step forms are great for:
1. Signup forms
Let’s take newsletter form templates. With the help of a free WordPress multi-step registration form, you can kill two birds with one stone: create a user-friendly sign-up process and gather valuable insights to send newsletters your readers want to read.

2. Lead generation forms
Multi-step forms enhance lead generation efforts by allowing you to collect detailed information on prospects without overwhelming them. This, in turn, makes it easier to evaluate and categorize prospects to determine their likelihood of becoming paying customers.

3. Surveys and feedback
The optimal number of questions for a feedback multi-page form varies depending on the survey's purpose, audience, and desired completion time. However, research suggests that 5 to 15 questions are generally adequate for achieving meaningful insights. If you group your questions wisely and split the form into steps, you’ll make it easier for users to commit.

4. Pre-order forms
Using multiple-step forms in WordPress to collect pre-orders allows users to easily validate information at each step which can help reduce mistakes. Because each step logically follows the previous one, it’s harder to miss critical fields or enter incorrect data.

5. WordPress multi-step registration form
It is advisable to use multi-step form builders for registrations, as it’s better to create a multi-step form than to overwhelm users with longer forms. Breaking the form into sections — like personal info, account setup, and preferences — helps people stay focused and finish.
With Claspo, creating forms like this is easy to create. You control all the form settings: required fields, steps, and flow. And if you need changes, updates are simple. In the end, this form works better for both users and your business.

UX tips to make WP form with multi-step layout better at converting
Even if you're using a free plugin or builder, good design still makes the biggest difference. Below are simple UX tips to help you create a multi-step WordPress form that not only looks great but also converts visitors into leads or customers.
Form progress indicators
One crucial element of a successful WP multi-step form is clear progress indication. Users like to know where they stand and how much more effort is required to finish. A progress bar or step indicators at the top of the multi-part form are great tools to visualize form pages progress.
If you’re using multi-step form templates from Claspo, this tip is included. All forms come with progress indicators, but you can adjust them as you see fit. For example, instead of a progress bar, you can add checkpoint pages that tell users how far they are in progress.
One step = one task
Equally important is the thoughtful grouping of related information. For instance, one step might focus solely on personal details, another on contact information, and so on.
You’ll find many multi-step form examples following this approach — each section has a clear purpose, allowing users to focus on completing one task at a time. To further support this, keep each step concise, ideally with no more than five to seven fields, and use headers to clearly indicate the purpose of each section.
Hints and instructions
When creating your multi step form in WordPress provide context and clear instructions. Users are more likely to complete forms when they clearly understand why certain information is being requested and how to fill in specific fields.
Add short, helpful descriptions at the top of each step. For example, a step asking for address details might include a note like, "Please provide the address where you'd like your items delivered."
Confirmation and error screens
The final moments of a user’s interaction with your multi-step form can leave a lasting impression about your business. A well-designed confirmation screen offers reassurance and clarity, helping users know their actions were successful. If you create multi-step forms with a WordPress multi-step form plugin like Claspo, you can easily customize these screens to match your brand.
Use a friendly tone that reflects your brand and visual cues, such as a green checkmark or celebratory icon, to reinforce success. Including a clear call to action (CTA), such as exploring their account or returning to the homepage, can smoothly guide users to their next step.
Error screens, on the other hand, should clearly explain what went wrong and provide actionable steps to fix the issue. Specificity is key — users need a clear path forward. Use a supportive tone and offer solutions like a "Retry" button or troubleshooting tips to reduce frustration and maintain trust.
Like progress bars, these screens are the default in Claspo. We simply added them for each page of your multi step form.
Mobile usability
Making your multi-step forms mobile-friendly is non-negotiable. While the average screen size today ranges from 6.1 inches to 6.7 inches diagonally — which may seem like enough space — you need to make sure your form is easy to interact with.
Fields and buttons should be large enough for easy tapping, and all elements should stack vertically to prevent horizontal scrolling. You might also want to disable large images or videos to save space.
Multi-step form WordPress plugin vs. custom code dilemma
So, you are faced with a choice: build custom code or use a multiple step form WordPress plugin like Claspo. Let’s break it down by ease of use, time to market, and cost — three key factors for everyday marketers who need quick results.
Ease of use
Custom code requires coding skills, which can be time-consuming and tricky to manage, especially for marketers who want to focus on their campaigns. In contrast, Claspo offers a simple, no-code WordPress form builder that anyone can use. You don’t need technical expertise — just drag, drop, and customize. Even more complex setups like a multi step form with conditional logic can be done easily with Claspo’s interface.
Time to market
Building custom forms can take days (or even weeks) of development and testing. With Claspo, you can handle form creation and launch a WP form multi-step for free and in under 15 minutes. This speed lets you quickly test new ideas, adjust on the fly, and keep your marketing efforts agile.
Cost
Custom coding requires substantial investment, factoring in developer fees and potential maintenance costs. Custom coding requires substantial investment, factoring in developer fees and potential maintenance costs. On the other hand, Claspo’s WordPress form builder plugin has a forever-free plan, meaning you can create forms at no cost. It’s a budget-friendly option for marketers looking to experiment without financial risk.
The bottom line
For everyday marketers, the WordPress wizard form plugin from Claspo is the clear choice. It’s free, user-friendly, and fast, allowing you to bring your ideas to life without hassles. Why spend time and money on custom development when you can achieve the same (or better) results in minutes with Claspo?


