Cart abandonment discount popup
Offer discount on abandoned cart
Turn hesitation into conversion by offering an immediate discount on abandoned cart.
Start for Free NowLifetime free plan
All features in a free plan
Turn hesitation into conversion by offering an immediate discount on abandoned cart.
Start for Free NowLifetime free plan
All features in a free plan
Let's set up a widget that pops up when a user removes an item from their cart. An incentive in the pop-up can nudge users to swap the product or pick something else instead of leaving the cart.
First, pick a template to speed things up — no need to start from scratch.
Now, make it blend seamlessly with your branding and website. The drag-and-drop editor lets you tweak everything, from background colors and images to transparency. If you need visuals, the built-in stock library has you covered. Click the part you want to change, and you’ll see its settings pop up on the right.
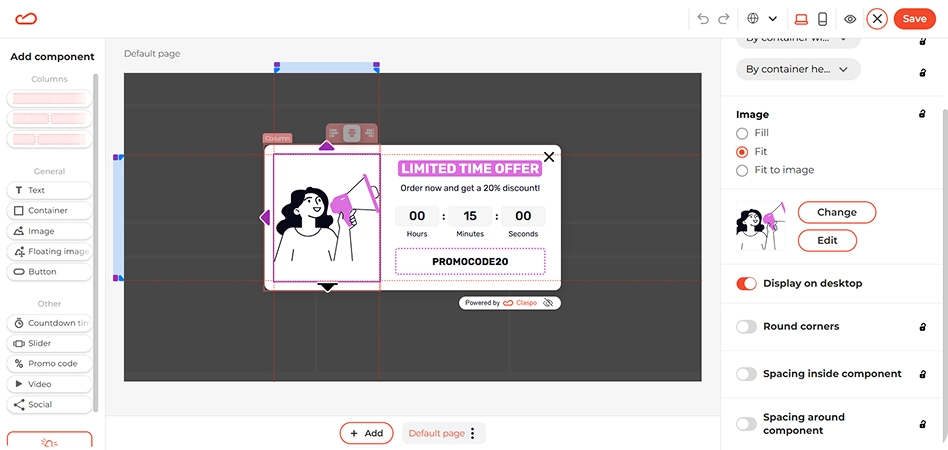
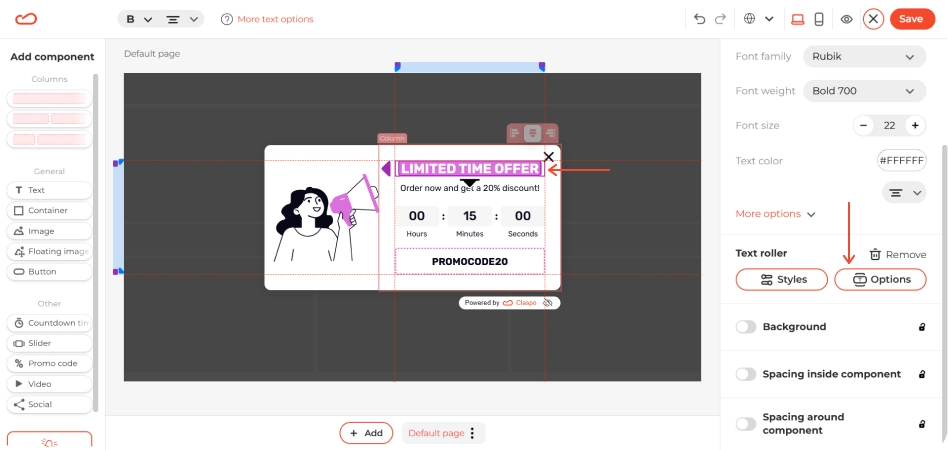
Fine-tune the branding so colors, fonts, and buttons match your site’s style. Even small tweaks, like adjusting font size or button shape, can boost engagement.
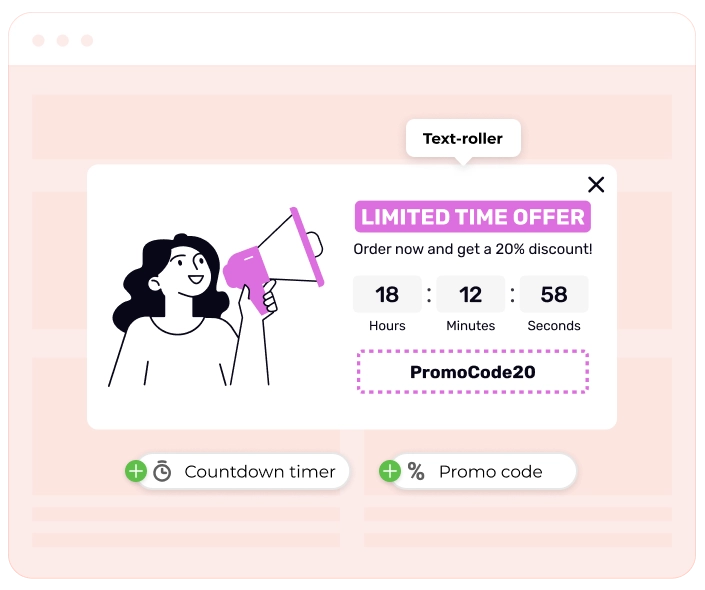
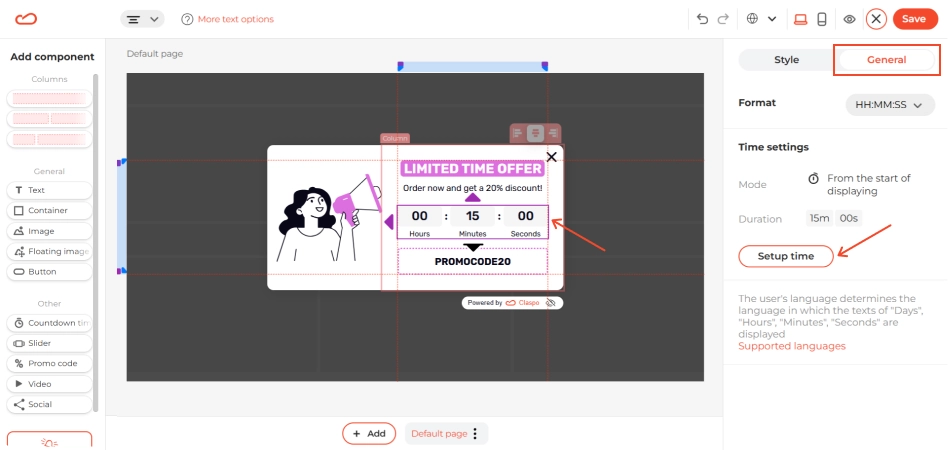
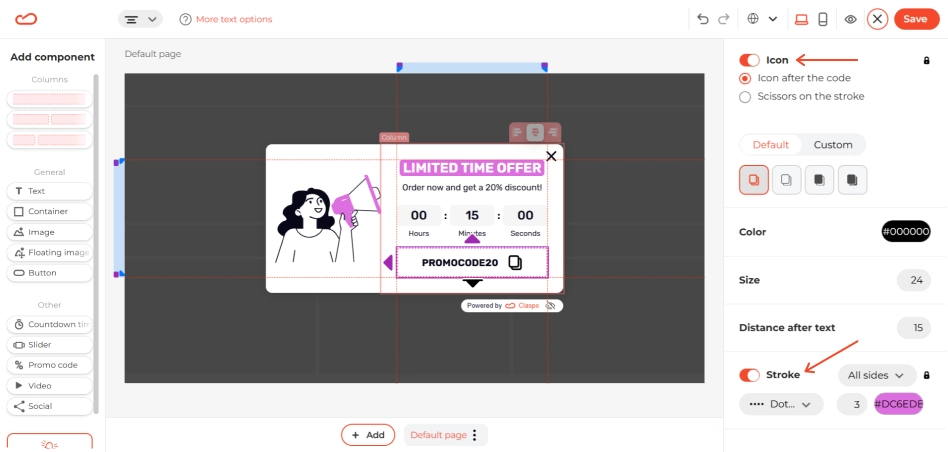
The template includes three key elements designed to catch the user’s eye and create urgency: a text roller, a countdown timer and a promo code. Here’s how to customize them:
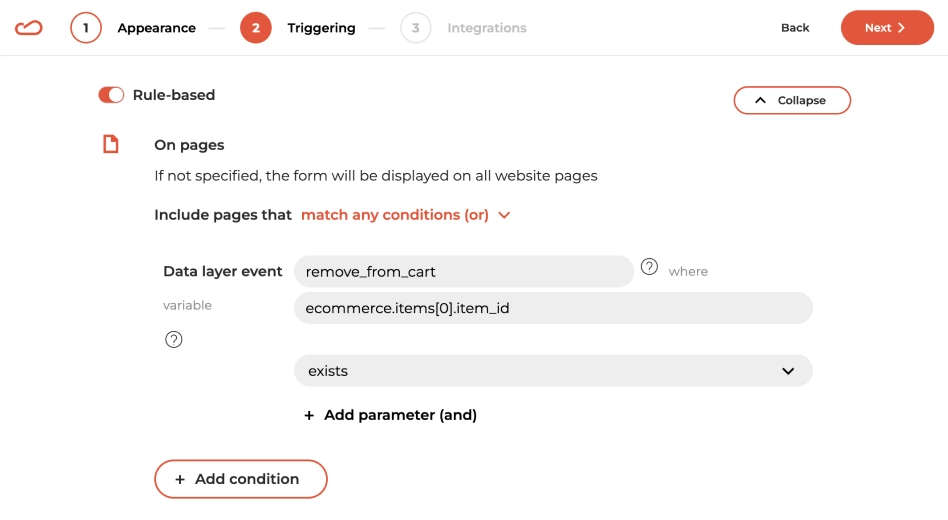
This widget should pop up at just the right moment — when a user removes an item from their cart. To make that happen, you’ll need to use Data Layer events, which track key interactions on your site.
If you haven't set up the Data Layer yet, check out our guide — it’s essential for making this work. Here’s how to configure it:
Go to the Triggering page and find the On Pages section. Click Add Condition, then choose Data Layer event from the dropdown menu. In the Include pages section, keep Match any conditions (or) as it is.
Now, specify the exact event that will trigger the widget. Set eventName to remove_from_cart. Then, add a parameter to track that product was removed — use item ID, with the value ecommerce.items[0].item_id. In the dropdown, select Exists to ensure it fires correctly.
That’s it, your personalized, behavior-based widget is done. Once everything is set up, your widget will appear exactly when users remove an item from their cart.
Explore our full library and find the perfect template to launch your next campaign in no time.
No matter what your goal is, there’s a widget for that. Explore pre-designed, user-friendly templates and find the perfect fit for your next campaign.