How to set it up
Step 1: Choose a template
Save yourself time and choose one of our templates. All you need to do is customize it to your needs, and it’s ready to launch.
Step 2: Customize
Replace the default text with your own message. Double-click the text component and replace the text.
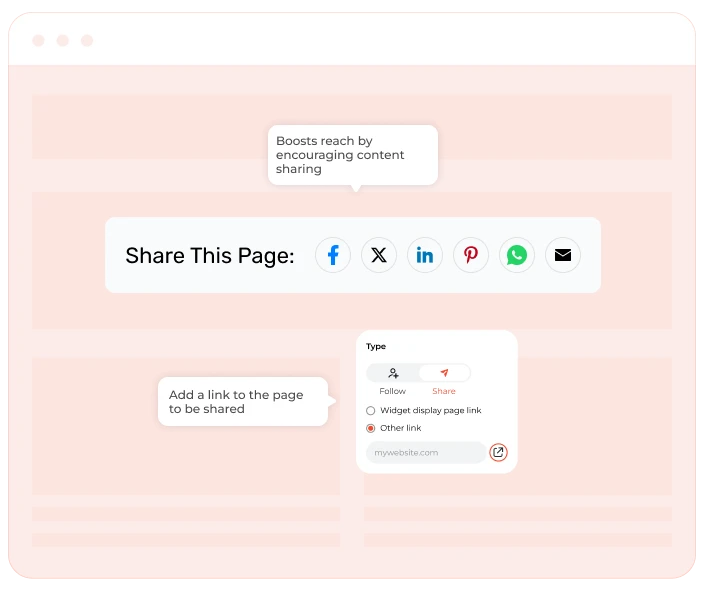
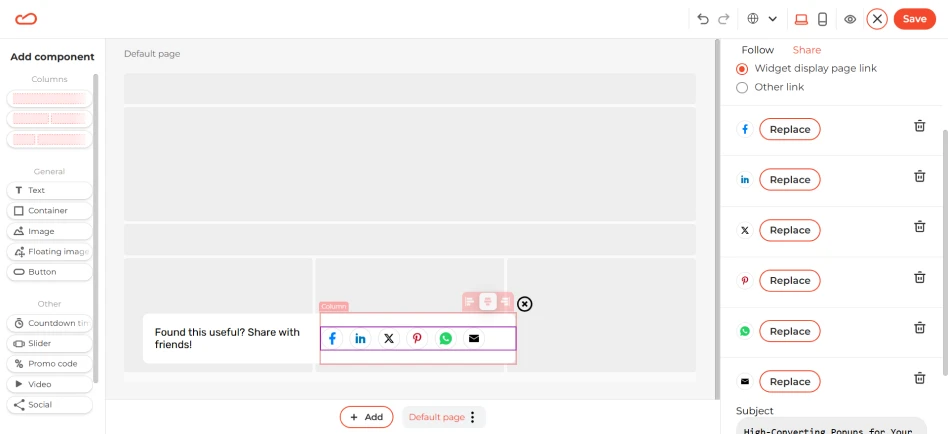
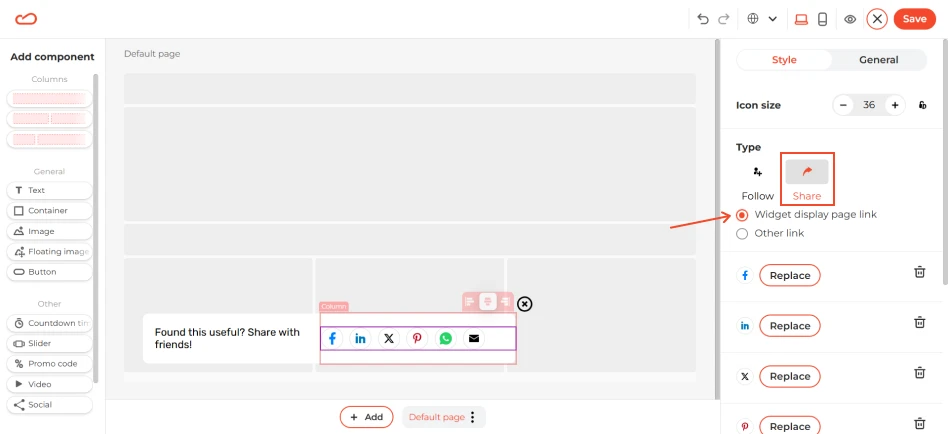
Currently, Claspo supports such social media sharing buttons as Facebook, LinkedIn, Twitter, Pinterest, WhatsApp, and Email. You can remove unnecessary social networks from the widget if you want to limit the number of social share buttons. Click on the component with the sharing buttons and remove the ones you don’t need in the right sidebar.
To make sure users share the page they’re viewing, enable the Widget display page link option.
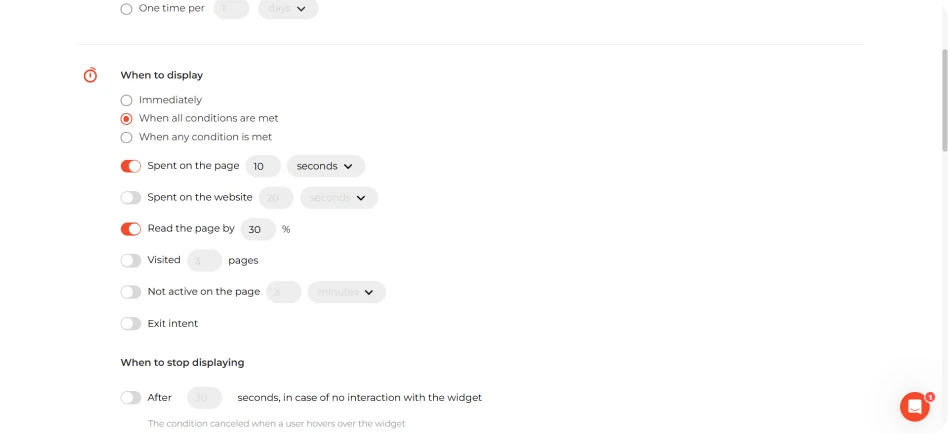
Once your widget is customized, save it and head to the display rules.
Step 3. Configure the display rules
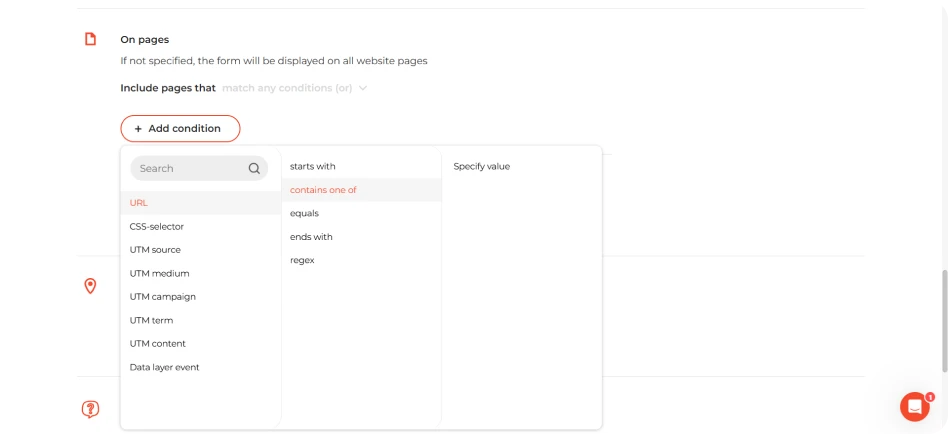
These social sharing widgets work best on blog articles, news pages, and landing pages with valuable guides, research, or reports. To set where your share widget needs to appear, scroll down to On Pages and set your conditions.
As for the trigger, showing the social sharing buttons immediately can feel a bit pushy. Instead, we recommend triggering after scrolling 50% down the page or after 8-10 seconds on the page, giving them a moment to settle in.
You can enable both conditions, so the widget gets triggered if either of the conditions is met. This can help cover a broader range of user behavior.
Step 4: Integrate with your marketing tools
Lastly, if you want to track the performance of the widget (and see which pages get the most shares), don’t forget to connect analytics. This kind of widget can be integrated with Google Analytics.
That’s it — once the widget is live, you’re ready to turn your visitors into social ambassadors!