Reservation form

Simplify appointment or service reservations

Automate service requests or appointments and build a loyal customer base by offering an easy and convenient way for customers to book services.

Start for Free Now

What it solves & why businesses use it

A reservation form helps businesses simplify the process of accepting and managing service requests or appointments. It solves the following issues:

  • Simplifying the booking process: Enables customers to schedule services or appointments without the need for direct interaction, reducing manual work for staff.

  • Enhancing customer experience: Provides a self-service option that is convenient for customers, improving their overall experience and satisfaction.

  • Automating confirmation and reminders: Allows for automated email or SMS confirmations and reminders, reducing no-shows and improving customer engagement.

When & how to use it

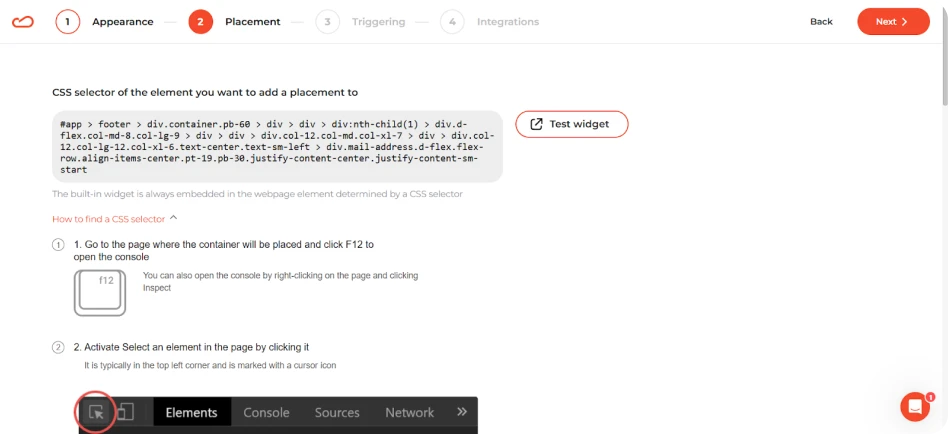
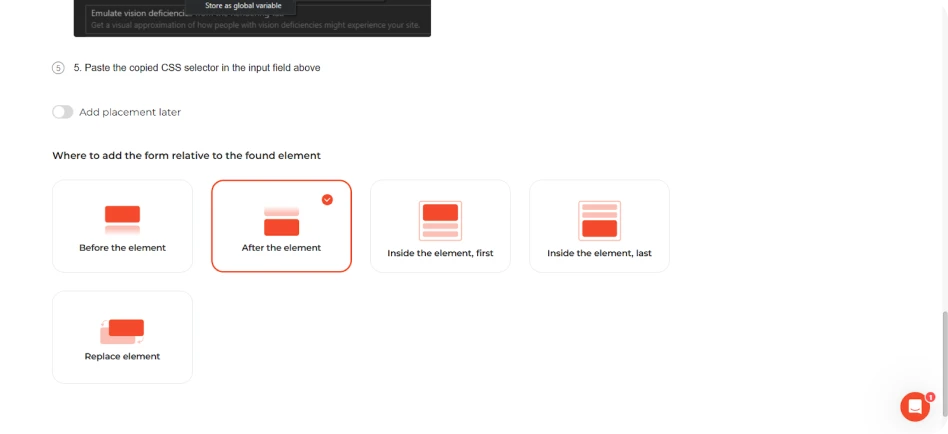
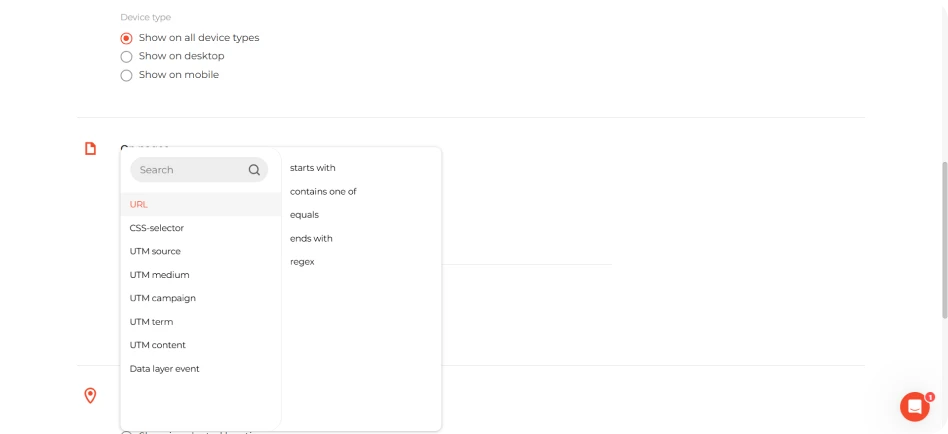
A reservation form is most effective when triggered at key moments throughout the user journey. Specific triggers include:

  • Homepage: Use the reservation form as a prominent feature on the homepage to immediately capture visitors looking to book services.

  • Service pages: Display the form on service-specific pages, such as a salon's "Haircut" page or a restaurant's "Private Dining" page, allowing users to book services directly from the page relevant to their needs.

  • Exit-intent: Trigger the reservation form when a visitor shows signs of leaving the site, offering them one final opportunity to book a service before they leave.

  • During promotions or special offers: Use the reservation form during limited-time promotions or special events to drive urgency and bookings.

  • Mobile use: For mobile users, make the reservation form easily accessible through a sticky launcher that remains visible as they browse the website.

How it looks

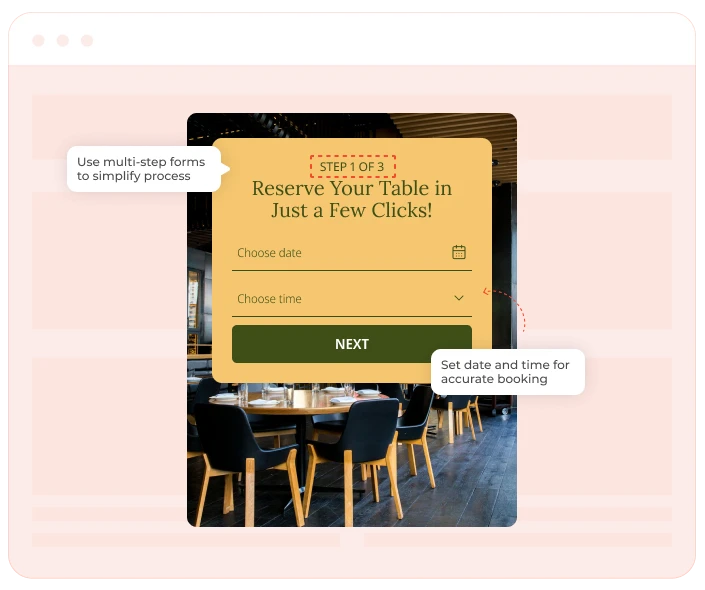
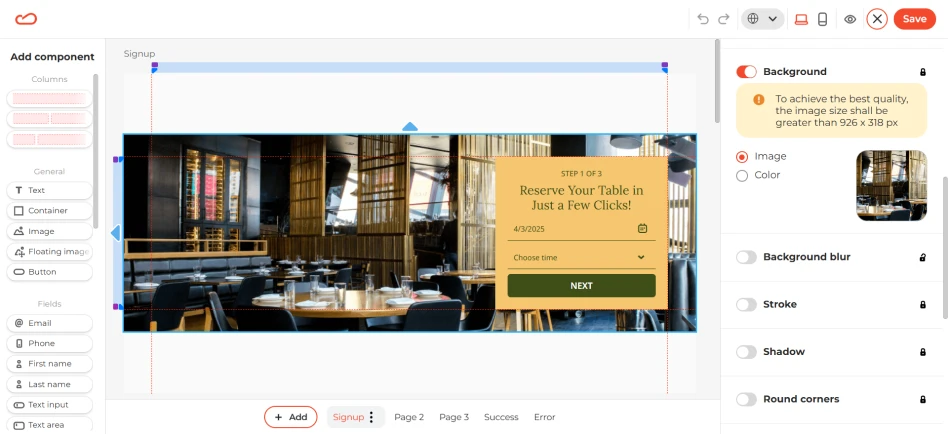
A reservation form should be simple and designed to gather the necessary information quickly and efficiently. Key design elements include:

  • Service selection: Dropdown menus or checkboxes for users to choose the type of service they wish to book.

  • Date & time picker: A calendar or time picker to allow users to select their preferred date and time for the service.

  • Customer details: Fields to collect basic information such as name, email, phone number, and any additional requirements.

  • Confirmation options: Include a section to confirm the booking, and show a message like “Thank you for your reservation! A confirmation email will be sent shortly.”

  • Mobile responsiveness: The form must be responsive and easy to fill out on mobile devices, with a clean design that fits small screens.

How to set it up

Step 1: Decide on a template

Browse our collection of reservation form templates to find one that suits your project.

Step 2: Customize

Now that you’ve picked a template, take a close look at the form and think about what needs to be changed to make it work for your needs. Besides the text, you can adjust the colors, fonts, placeholders, and icons. Just make all the changes you need to make the form look and work exactly how you want it to.

Step 3. Reservation form placement

The aim is to place your reservation form in a spot where it naturally fits into the customer journey.

For this case, the reservation form is an embeddable widget, meaning you can embed it directly into your page’s content. To do this, you'll need a CSS selector. Not sure how to find it? Don’t worry — there’s a step-by-step guide in the settings to assist you.

Once you have the selector, you’ll also need to decide where exactly the widget will be placed on the page.

Before finalizing everything, it’s recommended to test it first. Click the Test Widget button to preview its appearance and functionality on your website. If all looks good, you’re ready to go!

Step 4: Display rules

For embedded widgets, you have control over where and who sees them. You need to specify where the reservation form should appear using the URL or other criteria. Additionally, you can set the form's availability based on location and device type.

Step 5: Integrate with your marketing tools

Once your reservation form is set up, connect it to your CRM and/or ESP using Claspo’s native integrations or configure a webhook to send submissions to any other tool. This ensures that your sales or customer service team can quickly act on each lead, sending confirmations, reminders, or follow-ups.

That’s it — save the widget and publish it!

Fully designed reservation form templates

Explore our entire library and find the perfect template to launch your next campaign in no time.

Proven recipes to collect service requests

No matter what your goal is, there’s a widget for that. Explore pre-designed, user-friendly templates and find the perfect fit for your next campaign.

Need help or have questions?

Book a Call